Learning how to fence an apiary is essential for safeguarding your bee colonies from predators and environmental threats while maintaining ease of access for maintenance and observation. Proper fencing not only protects your bees but also enhances the overall efficiency of hive management and apiary security.
This comprehensive guide covers key considerations for planning, designing, constructing, and maintaining an effective apiary fence. From choosing suitable materials to implementing innovative solutions, you’ll gain valuable insights to create a secure and bee-friendly environment tailored to your needs.
Planning the Fence for an Apiary

Establishing a secure and effective perimeter around an apiary begins with meticulous planning. Proper site selection and thoughtful consideration of environmental factors are essential to safeguard the hive colonies from predators, unwanted intruders, and environmental hazards. A well-designed fence not only provides protection but also ensures ease of access for apiary management and maintenance.
In this section, we explore the key considerations for selecting the optimal fencing location, compare suitable fencing materials with their respective benefits, and Artikel a systematic approach for initial site assessment and layout planning to create a durable and functional apiary boundary.
Key Considerations for Selecting a Fencing Location
Choosing the appropriate site for fencing around an apiary involves evaluating multiple environmental and practical factors to ensure the safety and productivity of the beekeeping operation. These considerations help in minimizing risks and optimizing operational efficiency.
- Terrain and Topography: Flat or gently sloping terrain facilitates installation and maintenance of the fence. Avoid areas prone to flooding or erosion, as these can compromise fence stability and security.
- Vegetation and Natural Barriers: Existing natural features such as trees or shrubs can serve as supplementary barriers, but excessive dense vegetation near the hive entrance may obstruct flight paths or impede access.
- Accessibility and Wind Patterns: The fencing site should allow convenient access for equipment and personnel, while also considering prevailing wind directions that could influence hive temperature or expose the apiary to debris.
- Protection from Predators and Pests: Proximity to wooded areas or water sources may increase the likelihood of predators such as skunks, raccoons, or bears, necessitating more robust fencing solutions.
- Environmental Regulations: Verify local zoning laws and environmental guidelines that pertain to fencing height, materials, and proximity to property lines or wildlife habitats.
Suitable Materials for Apiary Fencing and Their Advantages
Choosing the right fencing material is crucial for durability, cost-efficiency, and functionality. Different materials offer various benefits and suit different environmental conditions and security needs.
| Material | Advantages | Typical Use Cases | Estimated Cost |
|---|---|---|---|
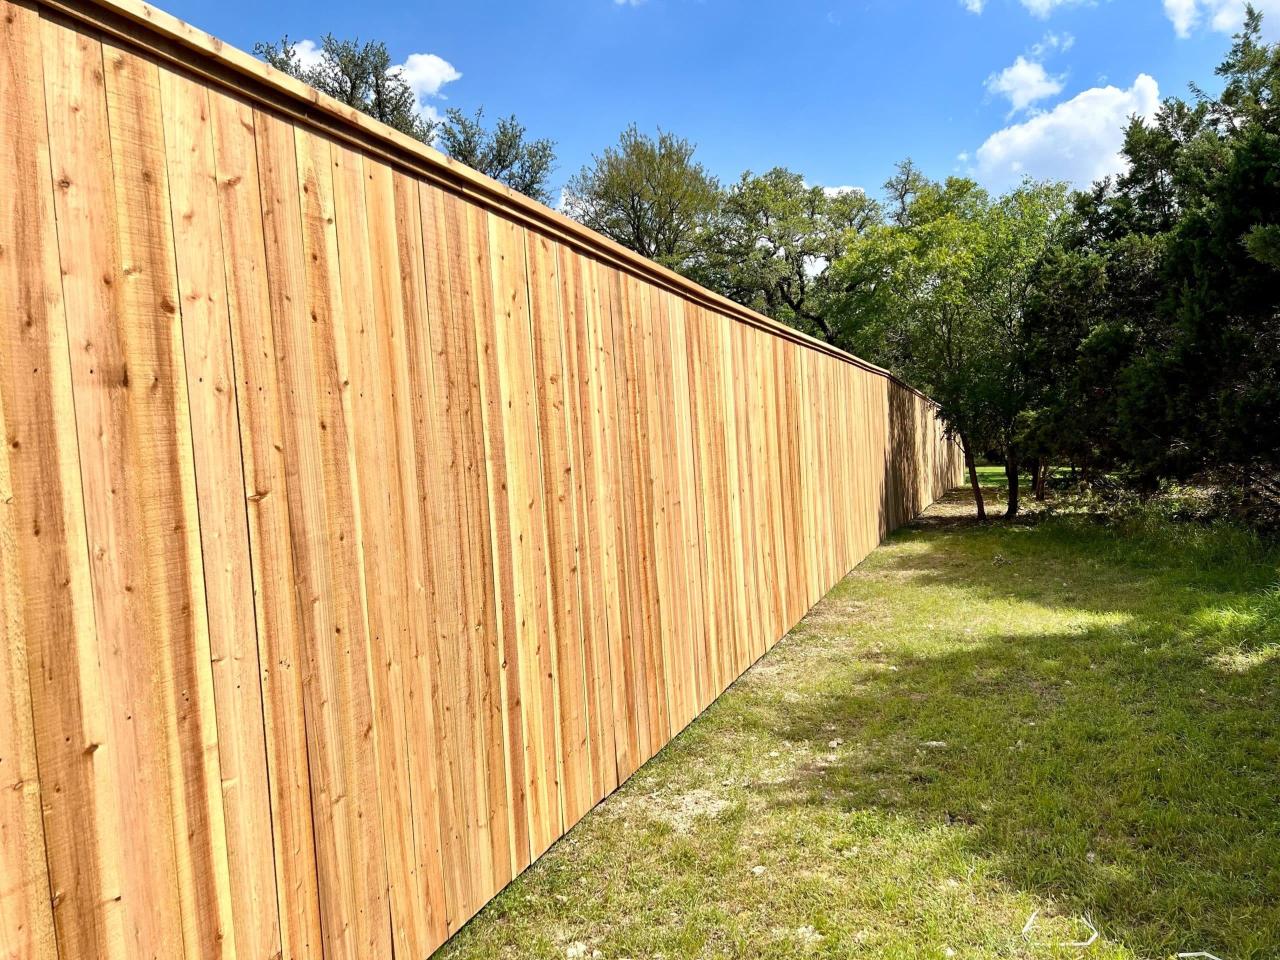
| Wood | Natural appearance, easy to customize, biodegradable | Low to medium security, aesthetic fencing around small to medium apiaries | $15 – $30 per linear foot |
| Chain-Link | High durability, good visibility, relatively low maintenance | Secure perimeter in areas with high predator activity | $20 – $40 per linear foot |
| Electric Fence | Cost-effective, easy to install, effective deterrent | Temporary or supplemental fencing, especially in predator-prone regions | $10 – $25 per linear foot |
| Mesh or Chicken Wire | Affordable, easy to assemble, flexible | Protecting hives from small predators like mice or raccoons | $5 – $15 per linear foot |
Comparison of Fencing Options: Dimensions, Costs, and Durability
When selecting fencing options, understanding their dimensions, associated costs, and expected lifespan helps in making an informed decision tailored to specific apiary needs.
Note: Durability often correlates with material quality and environmental exposure. For instance, wooden fences may require periodic maintenance or replacement after 5-10 years, whereas metal fences like chain-link can last over 20 years with minimal upkeep.
| Type of Fence | Typical Dimensions | Approximate Cost per Linear Foot | Expected Durability |
|---|---|---|---|
| Wooden Fence | 4-6 feet high, customizable length | $15 – $30 | 5-10 years (with maintenance) |
| Chain-Link Fence | 6 feet high standard, customizable length | $20 – $40 | 15-25 years |
| Electric Fence | Variable, typically 3-4 feet high | $10 – $25 | 5-10 years, depending on voltage and exposure |
| Mesh or Chicken Wire | 3-4 feet high, roll lengths vary | $5 – $15 | 3-7 years (depending on weather) |
Step-by-Step Procedure for Initial Site Assessment and Layout Planning
Proper site assessment and detailed layout planning are fundamental steps to ensure the fencing system aligns with environmental conditions, security requirements, and operational convenience. Following a structured approach enhances the overall effectiveness and longevity of the fencing.
- Survey the Site: Conduct a thorough survey to identify natural features, existing vegetation, and access points. Use measuring tools or GPS devices to determine property boundaries and potential obstacles.
- Assess Environmental Factors: Evaluate terrain stability, drainage patterns, prevailing wind directions, and exposure to sunlight or shade. Note areas prone to erosion or flooding.
- Determine Fence Perimeter and Dimensions: Measure the perimeter of the designated apiary area, considering future expansion possibilities. Decide on fence height and gate locations based on predator control and accessibility needs.
- Identify Suitable Materials and Construction Details: Based on environmental assessments and budget, select appropriate fencing materials and plan installation procedures, including posts, anchors, and reinforcement points.
- Draft a Layout Plan: Create detailed sketches or diagrams indicating fence lines, entry points, and other relevant features. Mark positions for gates, observation points, and maintenance access.
- Obtain Permits and Verify Regulations: Check local regulations regarding fence height, materials, and boundary lines to ensure compliance before commencing installation.
Designing the Fence Structure

Constructing an effective fence for an apiary is a critical step in ensuring the safety of the hive population while promoting a bee-friendly environment. The design principles should balance security needs with the natural behaviors of bees, preventing predators from intruding and allowing easy access for maintenance and hive inspections. Thoughtful planning in the structural aspects of the fence contributes significantly to the longevity and effectiveness of the apiary setup.
Implementing the right design involves selecting appropriate materials, dimensions, and features that account for local wildlife, environmental conditions, and operational convenience. A well-designed fence not only deters predators such as skunks, raccoons, or larger mammals but also ensures that the bees can come and go freely without causing them stress or risking their escape. The following guidelines detail the essential considerations in designing a secure, functional, and bee-friendly fence structure for your apiary.
Choosing Fence Height and Mesh Size
The height and mesh size of the fencing are vital parameters that influence the effectiveness of the barrier. These dimensions should be selected based on the types of predators present in the area and the size of the bees, primarily to prevent intrusion and escape.
- Fence Height: A fence height of at least 1.8 meters (6 feet) is generally recommended to deter larger predators such as raccoons and foxes. In regions with more aggressive wildlife, increasing the height to 2.4 meters (8 feet) provides added security. The height should also prevent climbing or vaulting by predators, which may require incorporating smooth, non-climbable surfaces.
- Mesh Size: The mesh or wire gauge should be small enough to prevent predators from squeezing through. A common choice is 2.54 cm x 2.54 cm (1 inch x 1 inch) mesh, which effectively blocks raccoons and similar-sized animals. For smaller predators like weasels or martens, finer mesh—such as 1.27 cm x 1.27 cm (0.5 inches x 0.5 inches)—may be necessary.
- Bee Escape and Ventilation: While the mesh must be secure against predators, it should also allow sufficient airflow and bee movement. Incorporating a potential mesh barrier that has a slight tilt or overhang can prevent bees from escaping while maintaining protection.
Incorporating Gates and Access Points
Access points within the fencing system facilitate routine hive inspections, maintenance, and honey harvesting. Design features should prioritize ease of use, security, and minimal disturbance to the bees.
- Gate Design: Gates should be constructed with durable, predator-resistant materials such as heavy-duty galvanized steel or reinforced wood. A lockable latch system ensures security against unauthorized access or wildlife intrusion. The gate opening should be wide enough—approximately 1 meter (3.3 feet)—to allow the movement of hive equipment and beekeeping tools effortlessly.
- Access Point Placement: Position gates at convenient locations that minimize disturbance to bee flight paths. Consider placing gates at the corners of the enclosure for better spatial management and ease of entry.
- Maintenance Accessibility: Ensure that access points can be securely closed and are easy to operate, even when wearing protective gear. Installing a smooth threshold or step can assist in moving hive equipment in and out without damaging the fence or disturbing the bees.
Creating a Schematic and Selecting Materials
Developing a detailed schematic or blueprint of the fencing structure is essential for accurate construction and planning. This blueprint should incorporate measurements, material specifications, and layout considerations.
- Measurement and Layout: Determine the apiary’s dimensions, including the perimeter and desired internal space. Use these measurements to sketch a scale diagram, marking locations for gates, access points, and any features such as shade or water sources. For example, a typical apiary might be enclosed within a 10-meter by 10-meter square, with gates positioned for optimal access.
- Material Selection: Combine durability, safety, and bee-friendliness in material choices. Common materials include galvanized steel or welded wire mesh for the fencing panels, treated wood or metal for posts, and weather-resistant hardware for gates and latches.
- Structural Components: Include specifications for post spacing—generally every 2 to 3 meters (6.5 to 10 feet)—to ensure stability. Ensure that all components are corrosion-resistant and suitable for outdoor conditions. The schematic should also specify concrete footings for posts, especially in areas with high moisture or strong winds.
- Illustrative Planning: Visualize the schematic with detailed measurements, indicating the placement of each element. Use symbols or color-coding to distinguish between different materials, access points, and safety features, ensuring clarity during construction.
Accurate planning and thoughtful design of the fencing structure are instrumental in creating a safe, functional, and resilient apiary environment that supports healthy bee populations and efficient management.
Construction Techniques for Fencing an Apiary
Effective fencing is essential to protect your apiary from predators, prevent bees from escaping, and maintain a safe environment for both the bees and surrounding wildlife. Proper construction techniques ensure durability, security, and longevity of the fence, even under adverse weather conditions or pressure from animals. This section provides a detailed guide on the step-by-step process of installing fence posts, securing fencing materials, and organizing the structure for maximum resilience and functionality.
Building a reliable fence involves careful planning and precise execution to withstand environmental stressors and animal interactions. Using the right tools and safety equipment during construction not only enhances efficiency but also ensures the safety of workers. Follow these detailed procedures to establish a robust and long-lasting apiary fence.
Installing Fence Posts and Securing Fencing Material
Proper installation of fence posts forms the backbone of a sturdy apiary fence. The process begins with selecting high-quality posts, typically made of wood, metal, or treated lumber, suitable for outdoor conditions. Posts should be spaced evenly, generally 8 to 10 feet apart, depending on the type of fencing material used. Mark the locations of each post with stakes and a string line to maintain straight alignment.
To install the posts:
- Dig holes using a post-hole digger or auger that are at least one-third the length of the post deep, ensuring stability against wind and animal pressure.
- Place the post in the hole, ensuring it is vertical by checking with a level. Hold the post steady while filling the hole with soil, gravel, or concrete for extra stability.
- Compact the soil or pour concrete around the base, then allow concrete to set if used, which typically takes 24 to 48 hours.
Once the posts are securely installed, unroll or uncoil the fencing material—either wire mesh or panels. Attach the fencing to the posts using galvanized staples, wire clips, or fence ties, ensuring even tension along the entire length. For wire mesh, use fence stretchers to pull the material taut, preventing sagging or slack that could create escape routes or weak points.
Anchoring the Fence to Withstand Weather and Animal Pressure
Anchoring involves reinforcing the endpoints and critical points of the fence to ensure it withstands harsh weather conditions, such as high winds or heavy snowfall, and the pressure exerted by animals like bears, raccoons, or larger mammals. Proper anchoring also prevents the fence from tilting or collapsing over time.
Strategies for effective anchoring include:
- Using heavy-duty corner and end posts made of galvanized steel or pressure-treated wood, which are anchored deeper into the ground, typically 2 to 3 feet.
- Installing diagonal bracing or corner braces to distribute tension and prevent posts from leaning or twisting.
- Embedding fence posts into concrete footings at critical points, especially at gates or where the fence changes direction.
- Applying tensioning devices, such as come-alongs or tension bars, to maintain consistent pull along the wire or mesh.
Regular inspection and tightening of the fencing are essential, especially after storms or seasonal changes, to maintain structural integrity and security.
Ensuring Proper Tension and Alignment of Fencing Panels or Wire Mesh
Achieving proper tension and alignment during fence installation is crucial for durability and security. Loose fencing can sag over time, creating gaps that predators or bees can exploit, while overly tight fencing may stress the posts and materials.
To obtain optimal tension and alignment:
- Start at one end of the fence line and attach the fencing material securely to the first post, then proceed along the line, attaching it to subsequent posts.
- Use a fencing tensioning tool or come-along to gradually pull the wire or mesh tight as you move along the fence line.
- Check the height and straightness of the fencing periodically with a level or plumb line to ensure uniformity.
- Secure fencing to each post with clips or ties, ensuring no slack remains. Use additional tensioning devices at midpoints if necessary to prevent sagging.
For wire mesh, ensure that the bottom edge is buried slightly underground or reinforced with a kickboard to prevent burrowing predators. Maintain consistent tension across all sections, which extends the lifespan of the fence and reduces maintenance needs.
Tools and Safety Equipment for Fence Construction
Constructing an apiary fence requires specific tools and safety gear to facilitate efficient work and safeguard personnel. Proper preparation minimizes accidents and ensures quality craftsmanship.
- Tools:
- Post-hole digger or auger for excavating holes
- Hammer or fencing stapler for attaching fencing material
- Wire cutters and pliers for shaping and cutting wire mesh
- Level and plumb line for ensuring verticality and alignment
- Measuring tape and stakes for marking post locations
- Tensioning tools, such as come-alongs or fencing stretchers
- Concrete mixer or mixing tools if concrete footing installation is planned
- Safety Equipment:
- Work gloves to protect hands from sharp wire or splinters
- Safety goggles or glasses to shield eyes from debris and wire snaps
- Steel-toed boots for foot protection against heavy posts or equipment
- Hearing protection when operating power tools or augers
- Protective clothing, such as long sleeves and pants, to prevent cuts and abrasions
Using the right tools and safety gear enhances the efficiency of fence construction and minimizes the risk of injury. Regular inspection of equipment and adherence to safety protocols are recommended throughout the process to ensure a successful and safe fencing project.
Maintaining and Securing the Apiary Fence
Ensuring the security and integrity of the apiary fence is vital for protecting the hive from predators, trespassers, and environmental damage. Regular maintenance and vigilant inspection practices help in identifying vulnerabilities early and extending the lifespan of the fencing system.
Implementing routine procedures for inspection and repair not only preserves the physical barrier but also reinforces the apiary’s overall safety. Consistent upkeep, especially at vulnerable points such as gates and corners, is essential to prevent breaches that could compromise the apiary’s security.
Routine Inspection Procedures
Regular inspections are the cornerstone of effective apiary fence maintenance. These procedures should be conducted at least monthly, with increased frequency during seasons of extreme weather or high wildlife activity. The goal is to detect damages, weaknesses, or signs of tampering early enough to undertake timely repairs.
During inspections, focus on the following:
- Checking for broken or loose fence panels, wires, or posts.
- Assessing the stability of the fence posts, especially after storms or heavy winds.
- Looking for signs of animal intrusion, such as burrows near fence bases or bite marks on wooden parts.
- Inspecting the integrity of gate mechanisms, latches, and hinges.
- Monitoring areas where vegetation might be growing through or over the fence, which can weaken the structure or provide access points for animals.
Any damages or weaknesses identified during these inspections should be documented and addressed immediately to prevent escalation.
Reinforcement of Vulnerable Points
Gates, corners, and entry points are typically the most vulnerable parts of an apiary fence. Reinforcing these areas enhances overall security and reduces the risk of escape or intrusion.
Methods for reinforcement include:
- Installing additional bracing or corner posts to prevent sagging or leaning.
- Using heavier gauge wire or mesh at gates to withstand pressure from animals or potential intruders.
- Securing gate hinges with tamper-proof fasteners to deter forced entry.
- Replacing worn or damaged fencing materials immediately at identified weak points.
- Employing concrete footings for fence posts in high-wind or high-traffic areas to prevent shifting or collapse.
Seasonal Maintenance Checklist
Seasonal changes can significantly impact the condition of the apiary fence. Adapting maintenance routines to seasonal needs ensures the longevity and security of the fencing system throughout the year.
| Frequency | Activities | Responsible Personnel | Notes |
|---|---|---|---|
| Monthly | Inspect entire fence for damages, tighten loose fittings, clear vegetation | Apiary Manager / Maintenance Team | |
| Quarterly | Reinforce vulnerable points, replace damaged sections, lubricate gate hinges | Maintenance Crew | |
| Bi-Annual (Spring & Fall) | Deep cleaning of fence, check for pest or animal damage, reinforce at corners and gates, apply protective coatings if applicable | Apiary Caretaker / Maintenance Specialists | |
| Annually | Complete structural assessment, replace worn posts, upgrade fencing materials as needed | Structural Engineer / Fencing Contractor |
Adhering to this schedule ensures the fence remains robust against environmental and biological challenges, maintaining a secure environment for the apiary year-round.
Additional Tips for Effective Apiary Fencing

Establishing a secure and well-integrated fence around an apiary is crucial for the health and safety of the bee colonies. Beyond the basic design and construction, thoughtful considerations regarding landscape integration, predator protection, aesthetic appeal, and innovative fencing solutions can significantly enhance the functionality and longevity of your apiary fence. These strategies not only safeguard your bees but also ensure that the fencing complements the surrounding environment and meets diverse operational needs.Integrating fencing with the existing landscape and vegetation requires careful planning to maintain ecological balance and promote natural pest control.
Incorporating native plants along the fence line can serve multiple purposes—providing habitat for beneficial insects, reducing erosion, and offering visual camouflage that deters predators. Using natural barriers such as dense shrubbery or thorny hedges adjacent to the fence can also act as an additional line of defense, preventing animals from burrowing or squeezing through gaps.Protecting bees from predators like skunks, raccoons, and bears necessitates robust measures that are both humane and effective.
Reinforced fencing materials such as galvanized steel mesh or hardware cloth are recommended to prevent these animals from gaining access. Installing a skirt of hardware cloth extending underground minimizes the risk of predators digging underneath the fence. For larger predators like bears, electric fencing—configured with appropriate voltage levels—serves as a strong deterrent, especially when combined with visual or auditory warnings to prevent habituation.Blending fencing with aesthetic or agricultural elements enhances the multifunctionality of the apiary site.
Using natural wood or bamboo fencing can create a rustic, eco-friendly appearance that integrates seamlessly into farm landscapes or garden settings. Incorporating trellises or planter boxes along the fence line allows for the cultivation of flowering plants that attract pollinators, thereby supporting local biodiversity and improving hive productivity. This approach ensures the fence is not merely protective but also contributes to the overall landscape design.Innovative fencing ideas tailored specifically for apiaries include electrified fences and natural barriers that enhance security while maintaining ecological harmony.
Electrified fencing, when properly installed and maintained, provides an effective, low-maintenance barrier against larger mammals without creating physical obstructions that may restrict airflow or visibility. Alternatively, natural barriers such as dense thorny bushes, stacked logs, or stone walls can be used to create formidable, environmentally friendly boundaries that require minimal upkeep. Combining these methods with motion-activated deterrents or scent-based repellents can further improve protection against persistent predators, ensuring the safety and well-being of the bee colonies.
Closing Notes
![Parts of a Wood Fence - Understanding the Components [Diagram]](https://teknogroup.web.id/wp-content/uploads/2025/09/239260736_3632774153492332_5382786980074994608_n.jpg "Parts of a Wood Fence - Understanding the Components [Diagram]")
In conclusion, establishing a well-designed fence around your apiary is a vital step towards ensuring the safety and longevity of your bee colonies. By carefully planning, constructing, and maintaining your fencing, you can create a secure haven that supports healthy hive development and sustainable beekeeping practices.